

How To Create New User In Ubuntu 16.04
Like other operating systems such as Windows and Mac, Linux is a multi-user operating system that supports multiple users, each with their separate user accounts. Adding users in any Linux system is one of the basic system administration tasks that any Linux user should be able to do with minimal effort In this topic, you will learn how to create a user on Ubuntu 20.04 LTS.
Requirements:
- A Cloud server or VPS. You can easily deploy a Cloudcone VPS or cloud server by visiting the cloud servers page.
- SSH access to the cloud server.
There are 2 main ways that you can add users on any Linux system:
- Using the command line
- Using the Graphical User Interface (GUI). If you are using an instance of Ubuntu 20.04 LTS with a graphical interface, then each user will have a home directory with distinct sub-directories such as 'Documents', 'Downloads', 'Pictures', 'Music', and 'Videos' to mention a few.
Let's dive in and take a look at each of these ways of adding users in a Linux system:
1) How to create a user on the command line
To add a user in Ubuntu on the command line, launch your terminal by pressing Ctrl + SHIFT +T or use the application manager to search and launch the terminal.
To add a user, use the syntax:
$ sudo adduser username
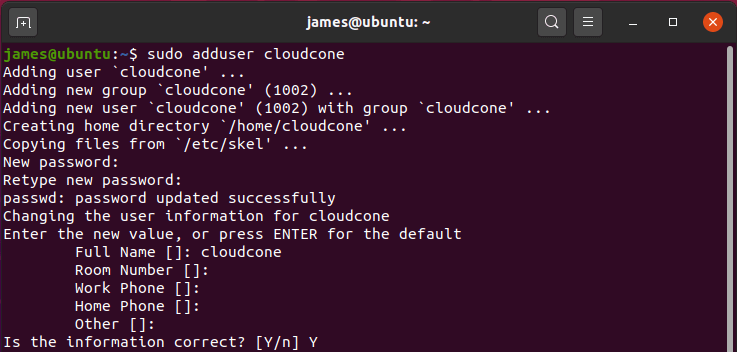
For example, to add a user called cloudcone, issue the command:
$ sudo adduser cloudcone
You will be prompted to provide your password and thereafter type in other details such as Full name, Room number and Tel. Phone and finally confirm your details.
Once the user is created, you can find more details about the user using the id command as shown:
$ id
This command displays the uid (user ID), gid (Group ID), and the group the user belongs to.

Additionally, you can view the /etc/passwd file which contains hashed passwords of users on the system.
$ cat /etc/passwd | grep cloudcone

To grant users administrative privileges, add them to the sudo group as shown;
$ sudo usermod -aG sudo username
In our case, the command will be:
$ sudo usermod -aG sudo cloudcone
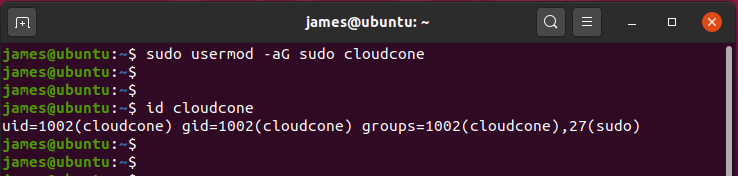
If you check the groups the user belongs to, you will found that sudo is among them:
1) How to add a user on Ubuntu using the graphical interface
If you are not a fan of the terminal you can, instead, add a user on Ubuntu using the new-look and polished User interface of Ubuntu 20.04. So, here are the steps:
Right-click on the desktop and select the 'Settings' option as shown:

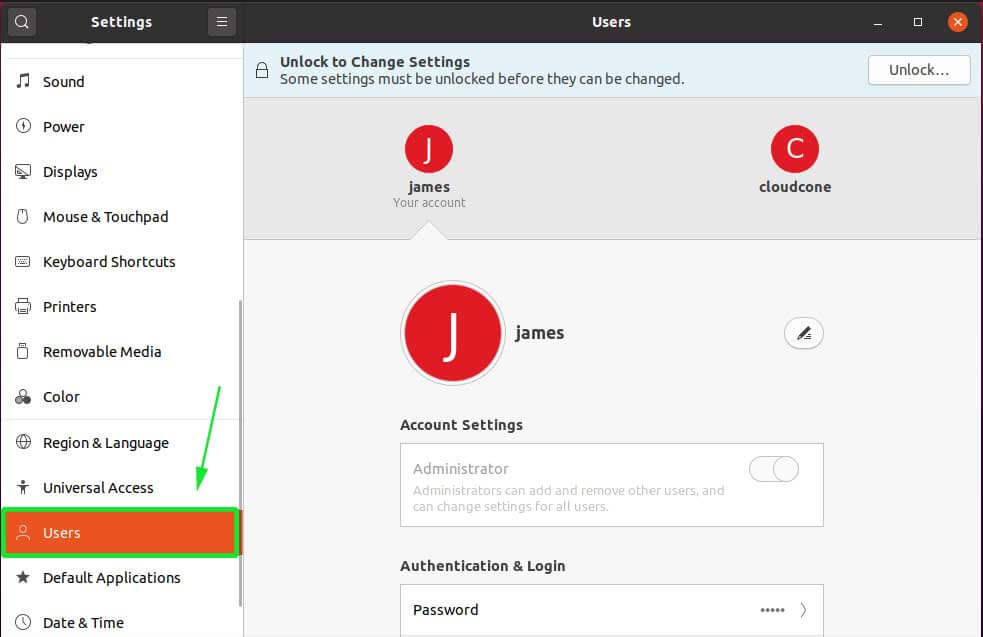
This opens the 'Settings' window. On the left sidebar, navigate and select the 'Users' option. This will display currently created logon users as shown
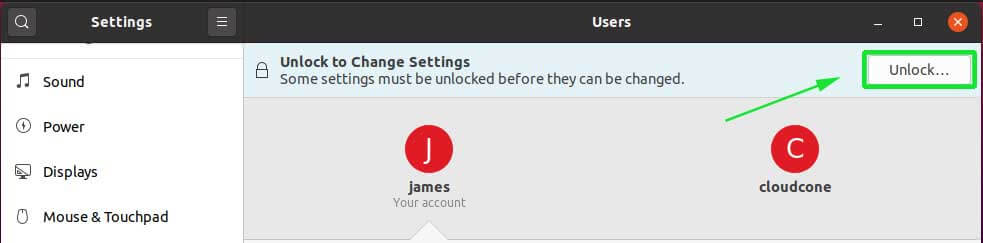
Before you can begin creating users or change any settings, click on the 'Unlock' button at the far top right.
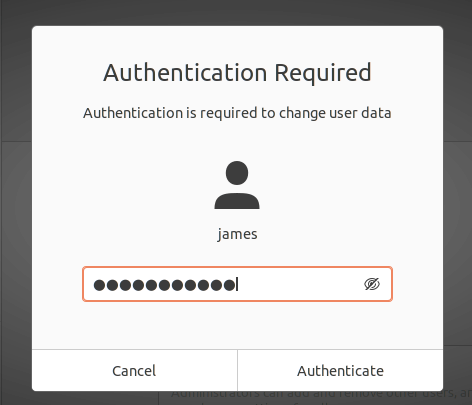
An authentication dialogue box will open requiring you to enter your password and authenticate. Type in your password and hit 'Authenticate'
Now click on the 'Add User' button to create a new user.

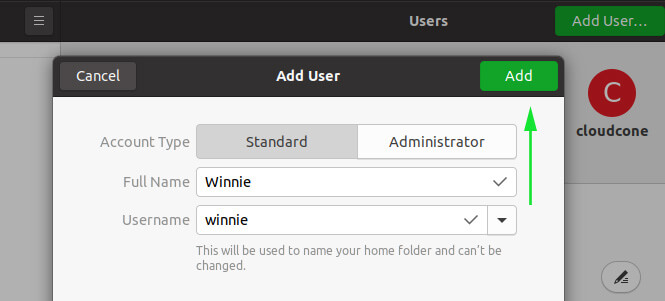
Next, fill out the name and specify the password for the newly created user. Also, you may opt to grant the user the ability to create their won password by selecting 'Allow user to set a password when they next login'.
If you want the new user to be an Administrative user, click on the 'Administrator' tab right next to the 'Standard' tab.

When you are done. Click on the 'Add' button a shown.
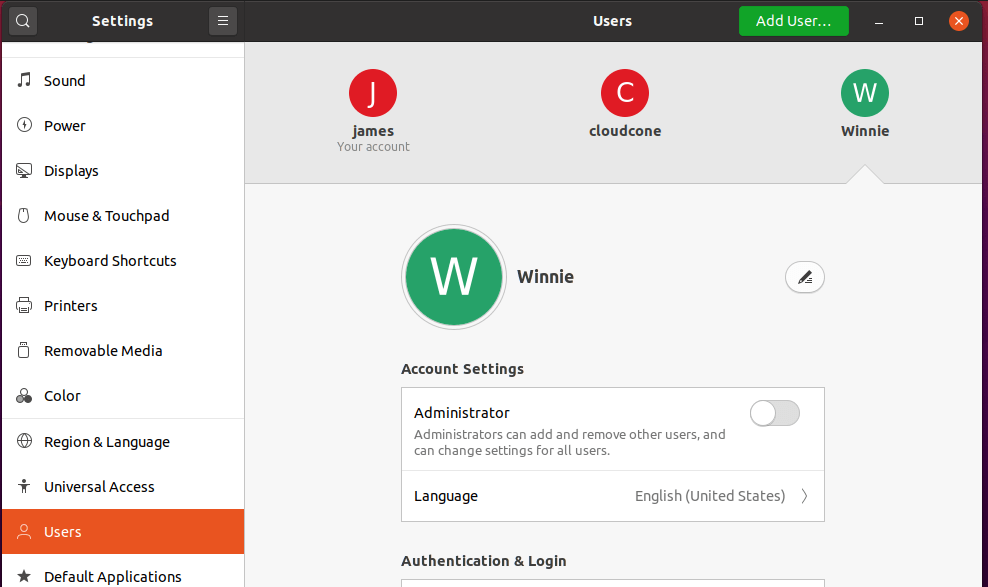
The newly created user will be displayed as shown:
And there you have it! In this guide, we showed you how you can create a new user in Ubuntu 20.04 LTS. Your feedback is much welcome.
How To Create New User In Ubuntu 16.04
Source: https://cloudcone.com/docs/article/how-to-create-a-user-on-ubuntu-20-04/
Posted by: davisthattere.blogspot.com
0 Response to "How To Create New User In Ubuntu 16.04"
Post a Comment